
Assets
Asset Details: Viewing and Editing an Asset
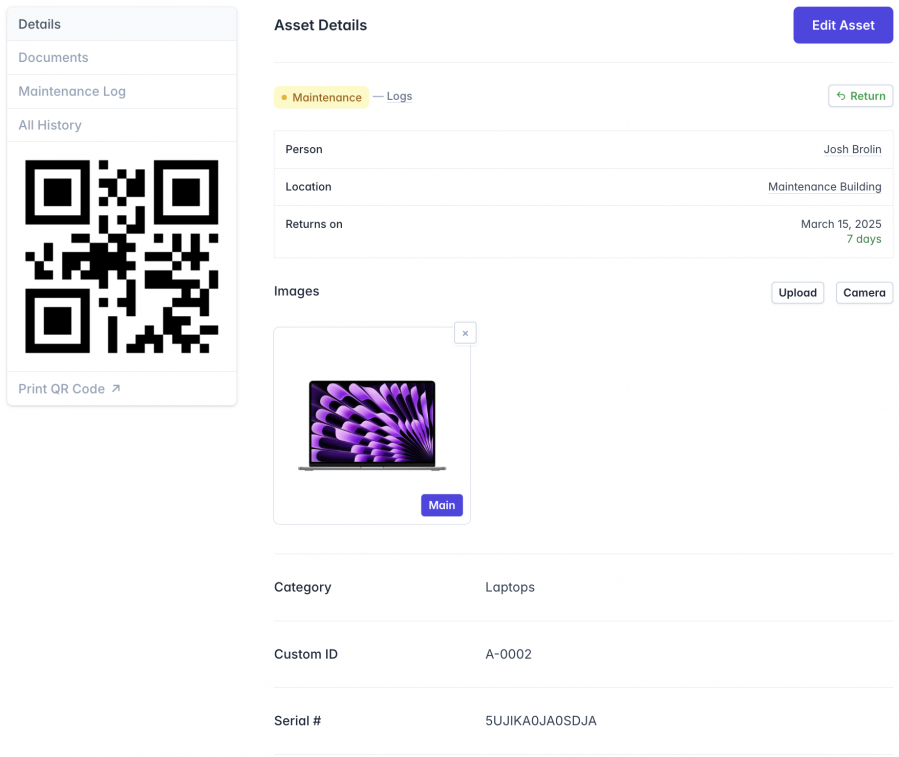
Viewing an asset provides a comprehensive overview of everything related to that specific asset.
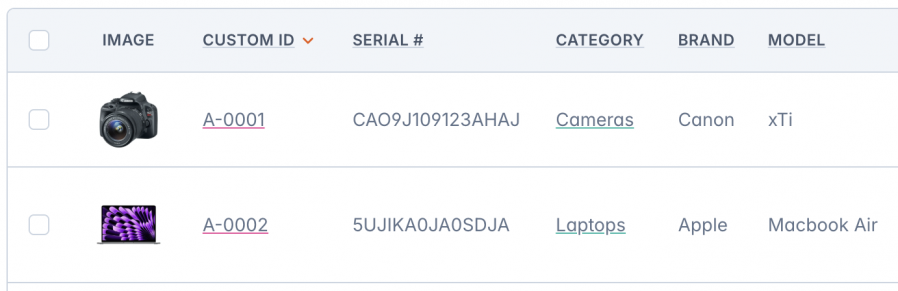
To view an asset, click on its Custom ID from the Dashboard.
On the Asset Details page, you have multiple options to customize, analyze, and update the asset's status. These include editing details, managing documents, viewing the maintenance log, tracking history, printing the QR code, and performing actions like transferring or returning the asset, as well as archiving, deleting, and restoring the asset.
Editing the Asset
To edit an asset, click on the Edit Asset button at the top-right corner of the page.
When editing an asset, every change is recorded in its history, which can be used to further analyze the asset's entire lifecycle.
Archiving and Deleting an Asset
Besides transferring an asset to different statuses or returning it to the base, you can also archive or delete it. Learn more by visiting Archiving an Asset and Deleting an Asset.
Menu Options
The Menu section on the View Asset page includes several options, each covered in their respective sections in this guide. Click on the links below to learn more:
- Documents: Allows you to upload and attach any legal documents related to the asset, such as receipts, invoices, warranties, insurance policies, and other important files.
- Maintenance Log: Displays a record of all maintenance activities performed on the asset, including notes and any photos taken at the time of sending it for maintenance or upon its return.
- All History: Shows the entire lifecycle of the asset, including edits, transfers, returns, maintenance, archival, deletion, and recovery—essentially the entire lifecycle of the asset.
- Print QR Code: Redirects to a page where you can customize the format and layout for printing the asset's QR code.
Quick tip: To print multiple assets' QR codes at once, check the Bulk Actions section in this guide.
Next: Learn about uploading legal and administrative documents in Asset Documents
