
Asset Actions
Transferring an Asset
Any asset that is Available (view Asset Statuses) can be Transferred away.
You can transfer an asset in two ways:
- Via the Dashboard
- Via the Asset Details page
Transfer an Asset via the Dashboard
The Transfer button is located to the right of each asset in the Dashboard.
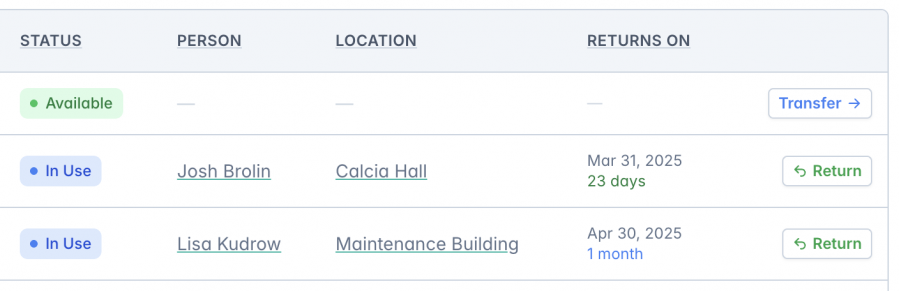
Click the Transfer button to open a modal where you can configure the options for the selected action.
Side note: To learn how to return an asset visit the Returning an Asset section in this guide.
Transfer an Asset via the Asset Details page
An asset can also be Transferred via the Asset Details page.

Similarly to the option in the Dashboard, Clicking the Transfer button brings up a modal where you can configure the options for the selected action.
Transfer Asset Modal
The Transfer Asset modal provides key criteria for transferring the asset, allowing you to specify details such as the person, location, and other relevant notes and options.
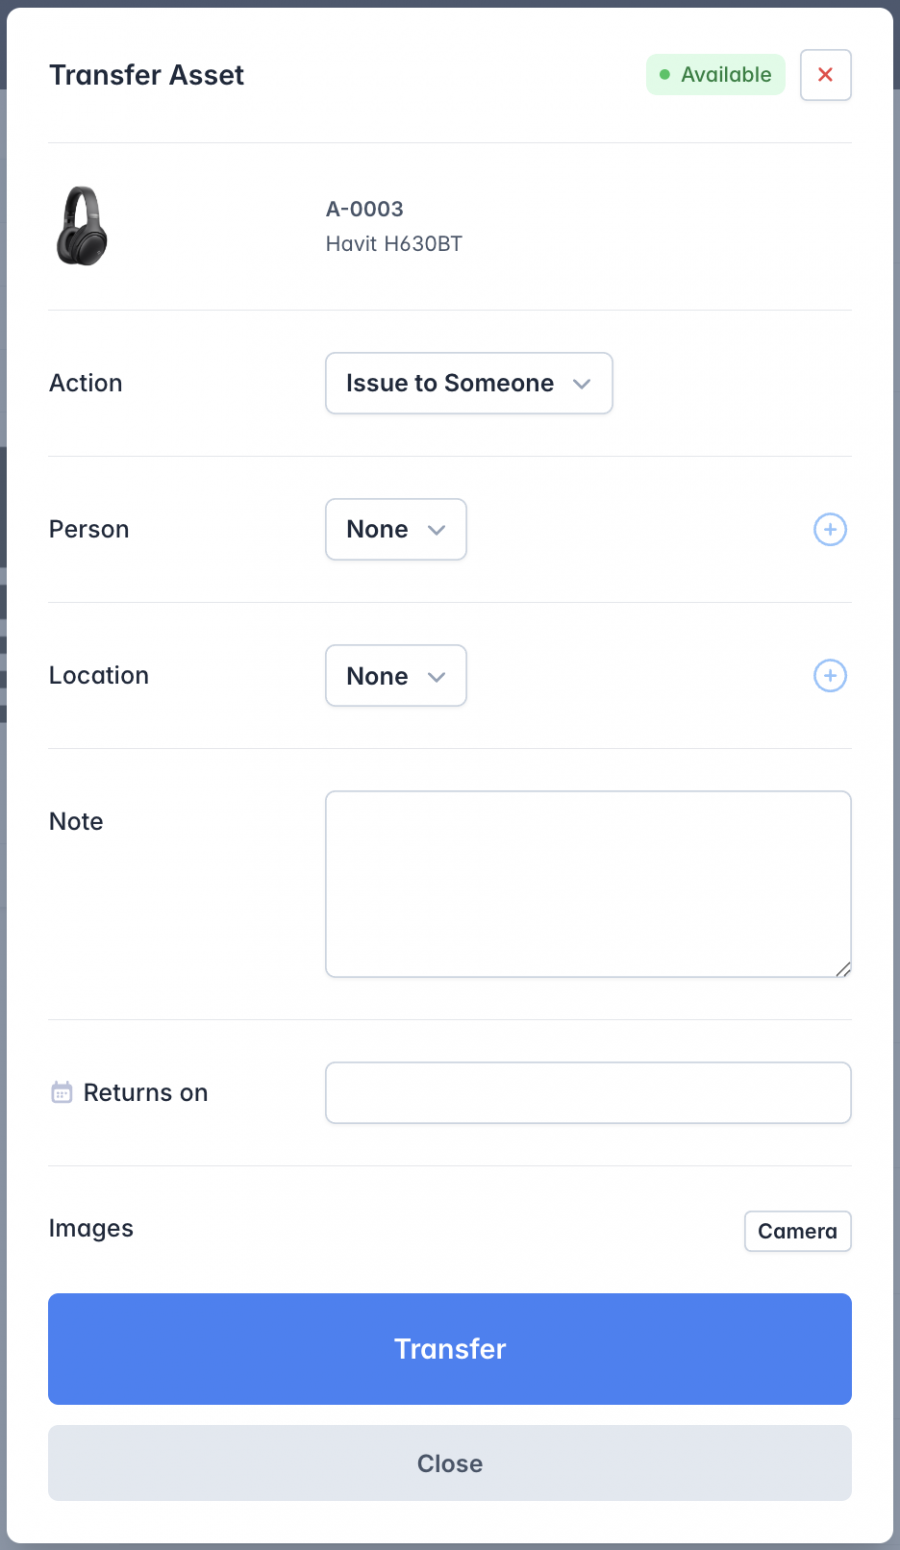
Modal title
To the right of the modal title, the system displays the asset’s current status. In this case, the asset is marked as "Available."
Action
The Action drop-down offers the following options:
- Issue to someone
- Send to maintenance
- Out of service
- Discard
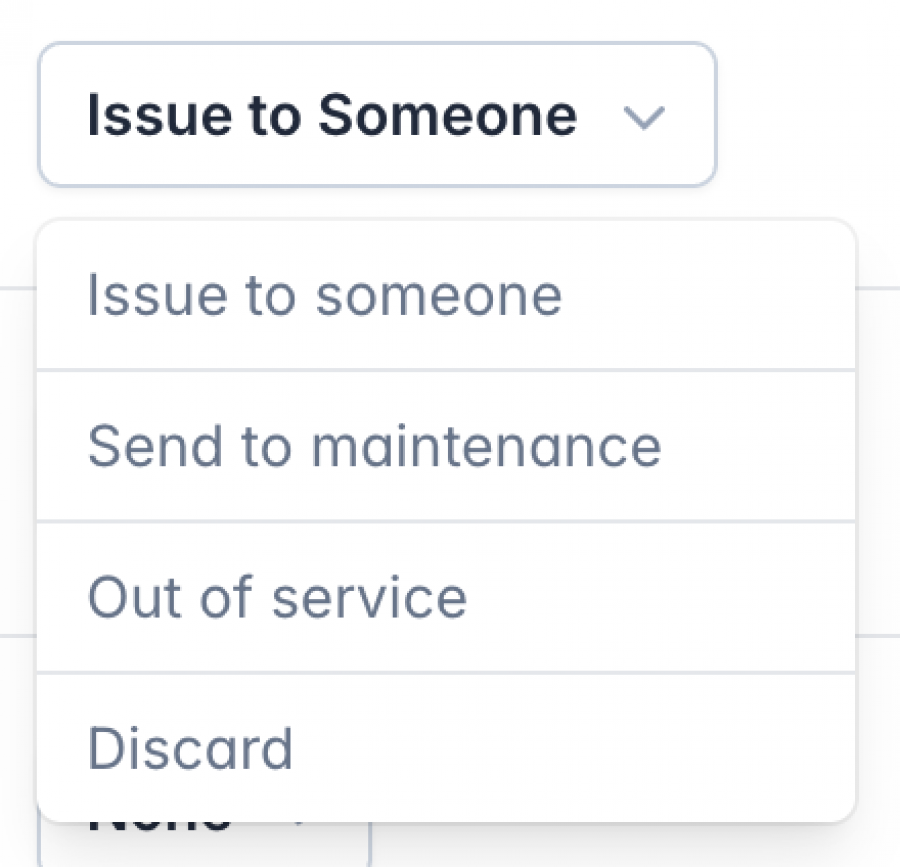
Issue to someone: Lending the asset to someone in the company.
Send to maintenance: Servicing the asset.
Out of service: An asset is currently not being offered.
Discard: Discarding the asset.
Quick tip: An asset can also have two other states, Archived and Deleted. To learn more view the following guides — Archiving an Asset and Deleting an Asset.
Person
The Person dropdown lists all previously added people and includes an option on the side to quickly add a new person on the fly, without navigating to Settings > People.

Quick tip: Selecting a Person is required only when the Issue to Someone option is selected in the Action drop-down. For all other options, it is not mandatory.
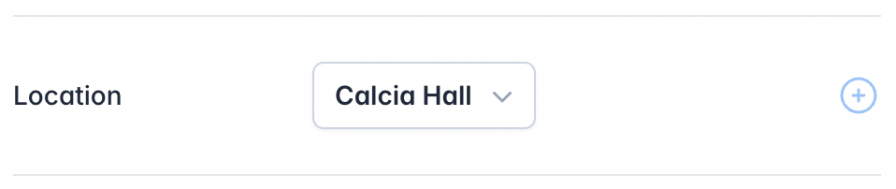
Location
The Location dropdown lists all previously added locations and includes an option on the side to quickly add a new location on the fly, without navigating to Settings > Locations.
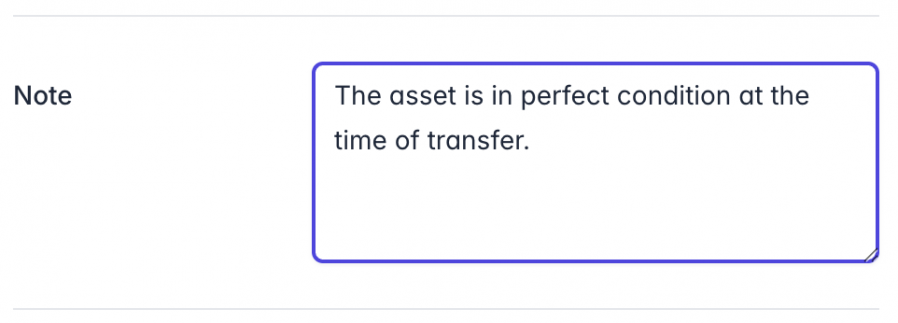
Note field
The Note field allows you to add any relevant details when transferring an asset. This can include information about the asset's condition or any other important notes.
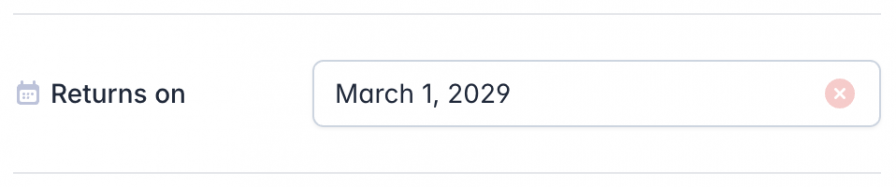
Returns on
The Returns on field allows you to set a return date for the asset. This is particularly useful when tracking assets in the Dashboard, as it enables filtering and sorting by return date to identify assets that are past due or returning soon.
Images
The Images field allows you to capture real-time photos of the asset. Clicking the Camera button activates the camera on your device (laptop, mobile, or webcam), enabling you to take and upload images instantly.
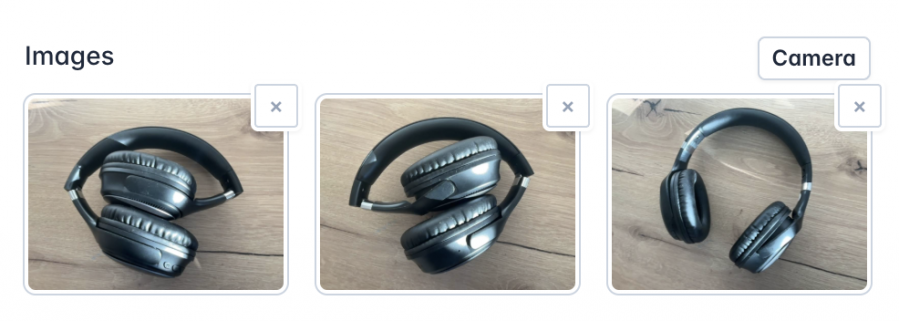
These images are recorded in the History of the asset, providing a complete view of its lifecycle.
Images can also be snapped upon Returning the asset to compare the condition of the asset between the time it was issued and the time it was returned.
Quick tip: When you remove an image, it doesn't get deleted immediately. Instead, it goes to the Trash, where you have 7 days to retrieve it. To learn more about how deleting various elements in AMS works, visit the Trash section in this guide.
Next: Learn how to Return an Asset
